Zeiss 12mm and 32mm Touit lenses for Fuji X-Pro1
a hands on review
Let me begin by saying I could have written this entire review in this one sentence: "The Zeiss Touit 12mm and 32mm are two of the best lenses I have ever tested -- resolution is exceptional, distortion is non-existent, look and feel are pro-quality perfect."
With that out of the way, let's move on to see what drove me to this conclusion.
 |
| A Zeiss 12mm Touit lens mounted on a Fuji X-Pro1 with the 32mm Touit beside it. |
The first thing you notice about the Touit lenses is that their build quality has a simplistic, scuptural elegance to it -- nothing extraneous, no knurling on the rings, just a stylish, minimal design. They look like they belong on the Fuji X-Pro1 camera, which is what I used to test them. The lenses are also made in an "E" model to fit the Sony Nex mount. They are slightly heavier than the comparable Fuji 14mm and 35mm focal lengths, but not so much that you would notice when using them. In fact, in themselves they seem quite light and easy to handle.
 |
| Zeiss Touit 2.8 12mm lens and Touit 1.8 32mm lens with lens hoods in place |
 |
| Zeiss Touit 2.8 12mm lens and Touit 1.8 32mm lens with hoods removed |
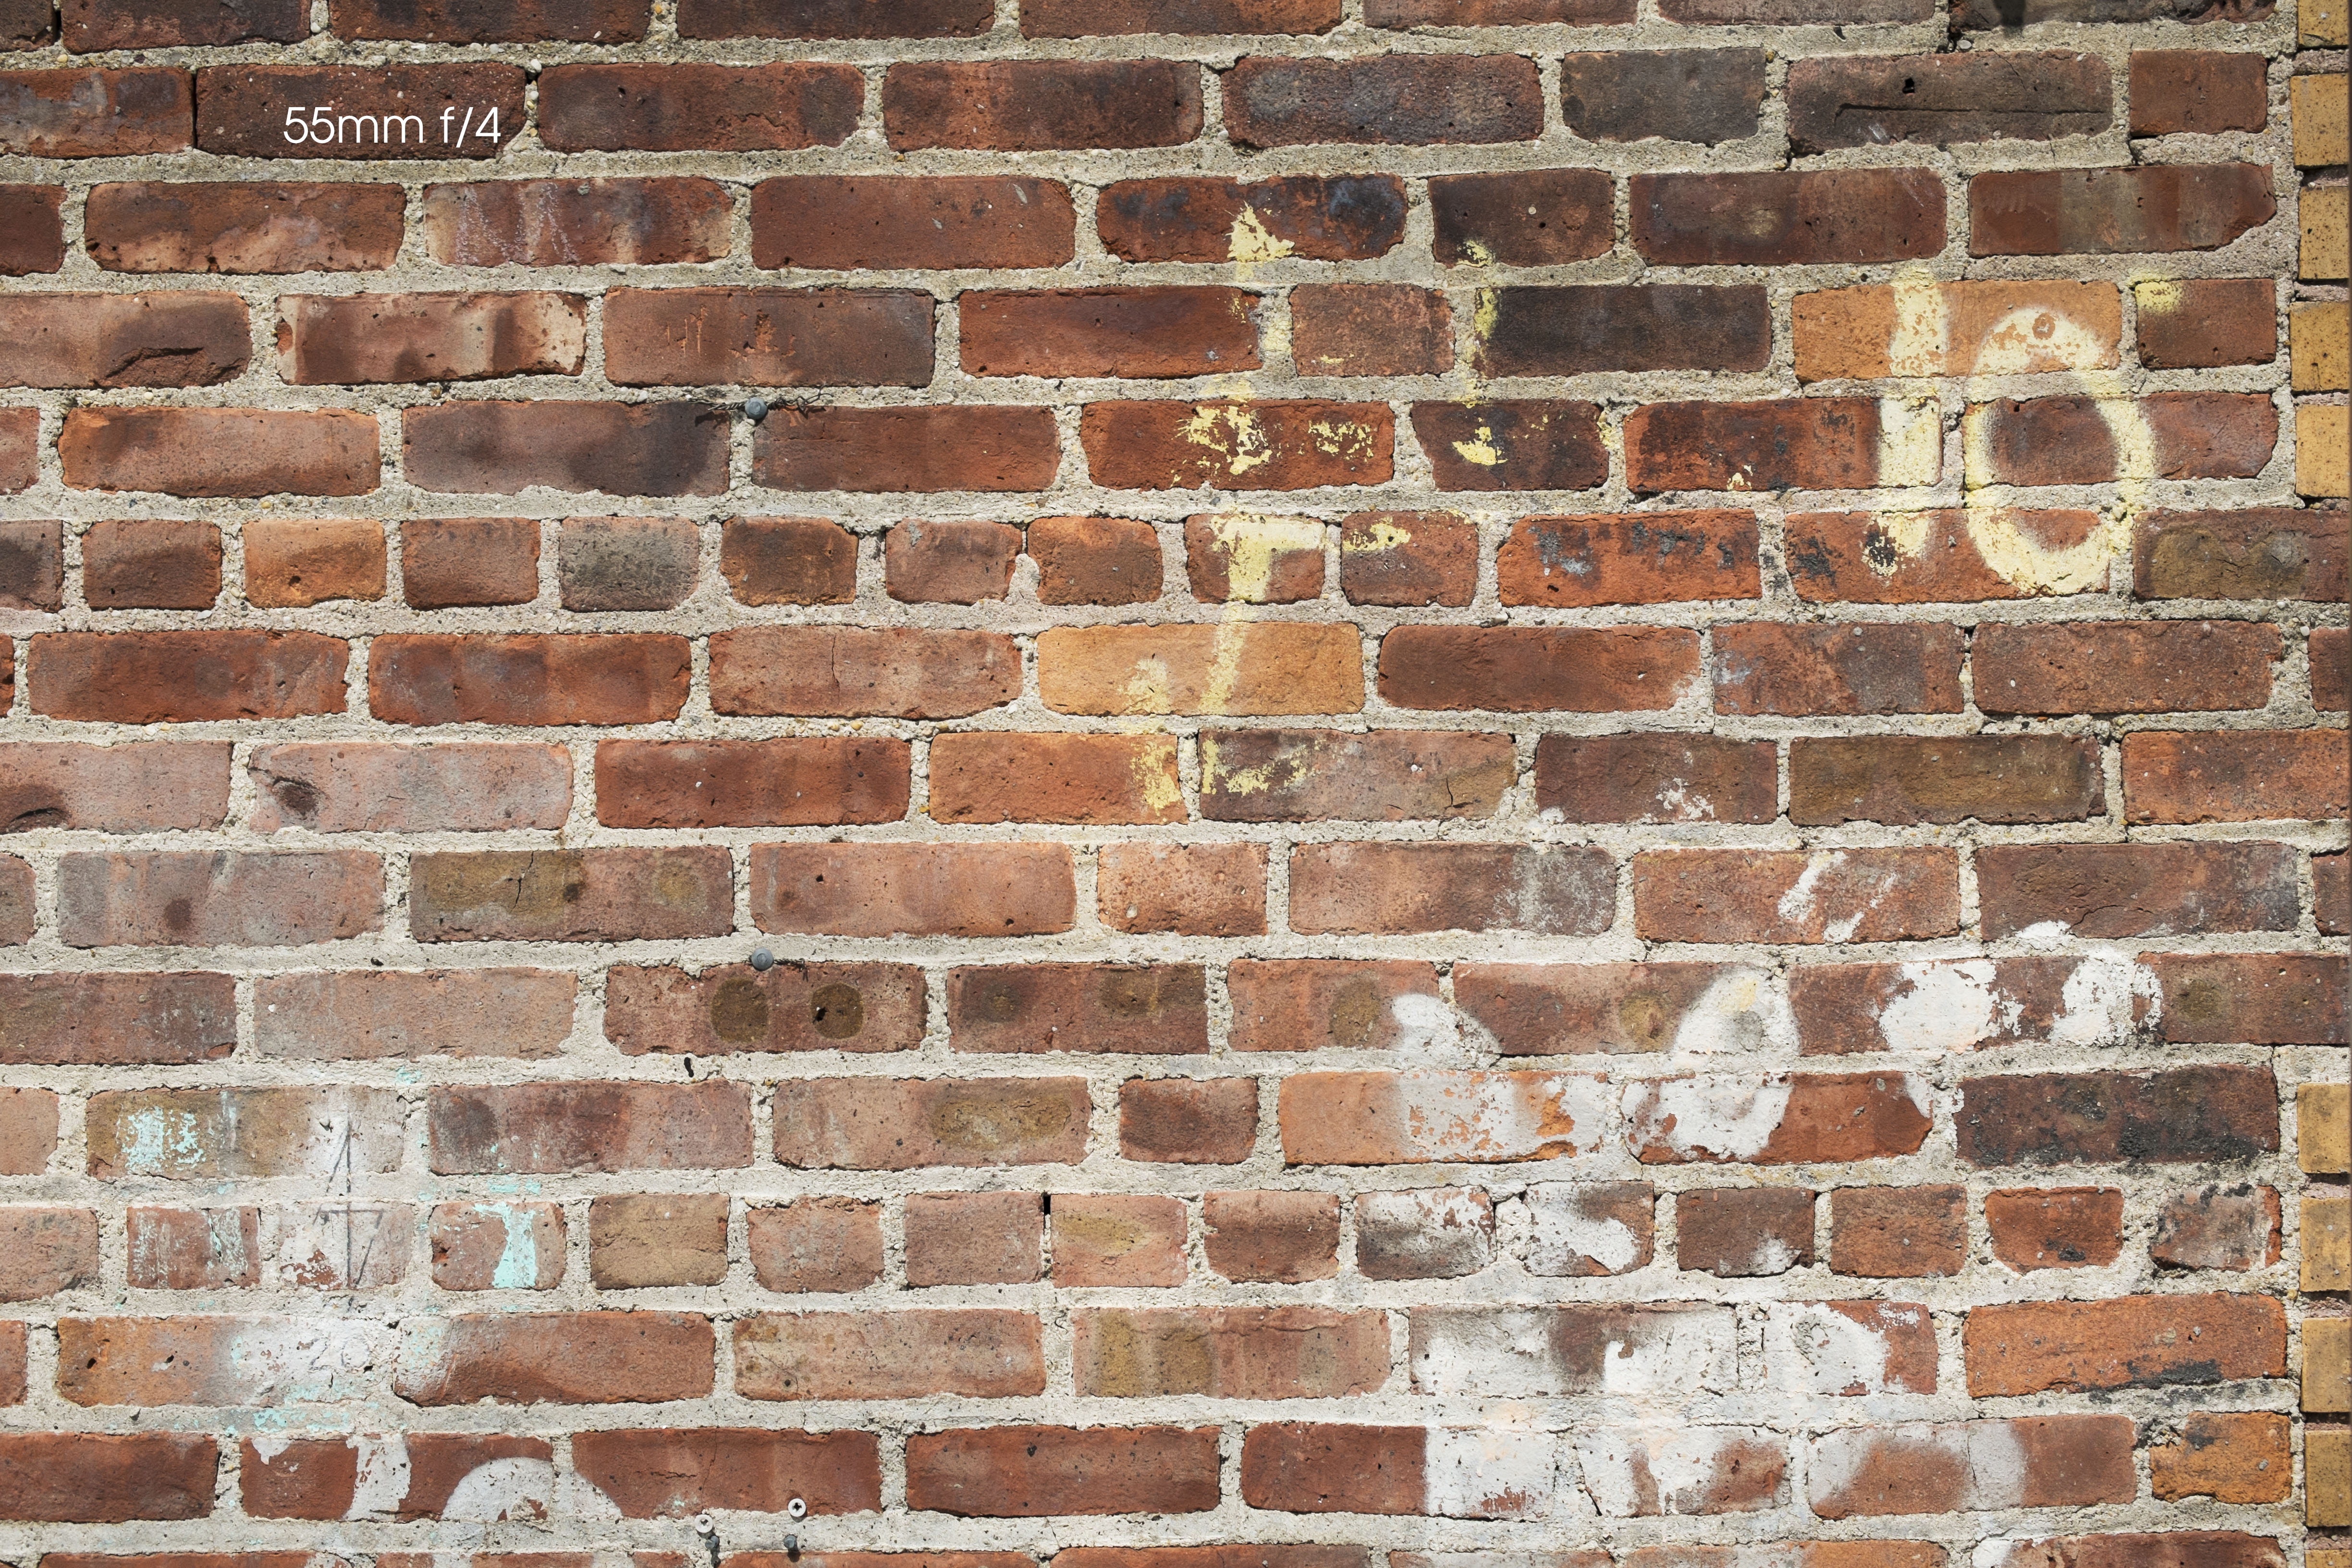
The first practical test I put the lenses through is my
brick wall test, the results of which are below. Download links are supplied below so you can judge the results for yourself. It was right after performing this test that I realized I was witnessing something special with these lenses. As you can see from the results, there is no visible distortion -- practically no vignetting, no bowing of lines, and the corners are sharp even at wide open apertures.
Zeiss Touit 12mm f/2.8 Distagon lens
The 12mm focal length of the Zeiss Touit is equivalent to 18mm in full frame and has a 99° angle of view. It weighs in at 9.17oz (260g) with a minimum focus distance of 7.09" (18cm), a 67mm filter size, and apertures of f/2.8-22. By comparison, this is shorter than the Fuji 14mm lens which is equivalent to a 21mm lens with an 89° angle of view. My review of the Fuji 14mm lens can be seen
here.
 |
| Download each of the Zeiss 12mm Touit high res tests using the links below. |
Below are some downloadable files from the Zeiss Touit 12mm lens, which should demonstrate its very high resolution and low distortion.
 |
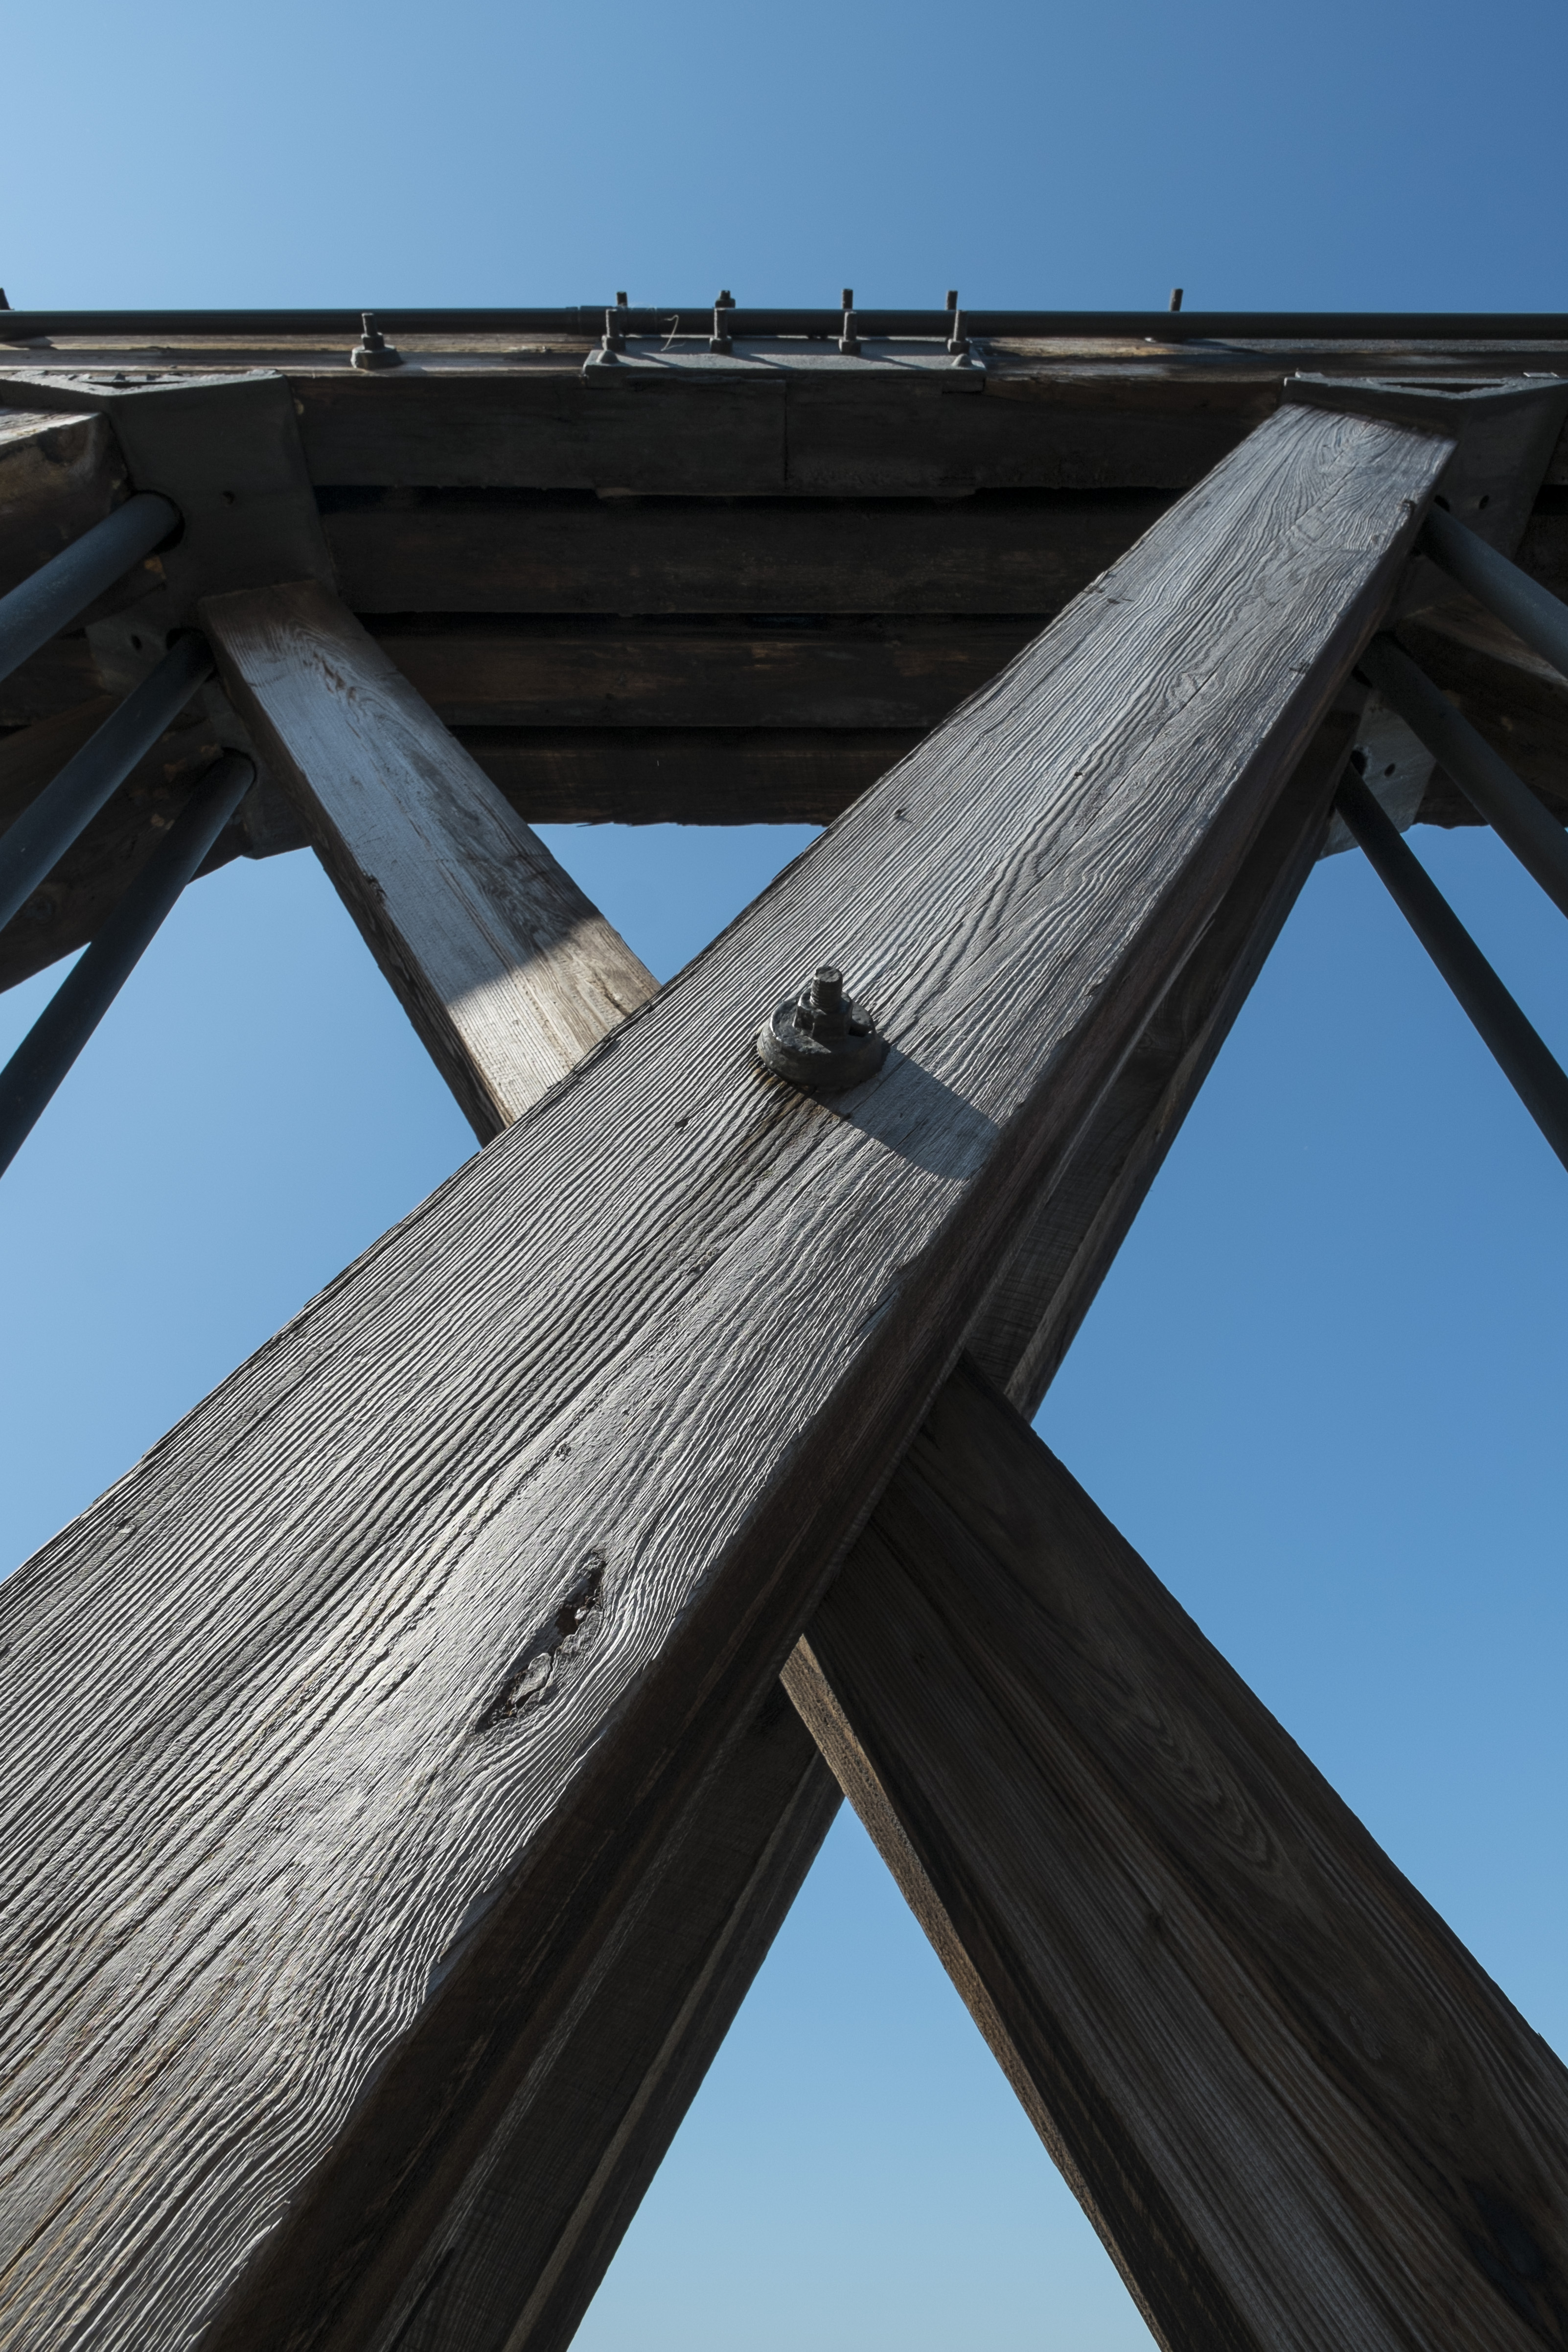
| A super wide angle lens such as the Zeiss 12mm is often used to obtain a sweeping perspective tying the foreground to background with the lens placed close to the foreground object and focus placed forward also. In this type of shot it is very important to have a sharp image in the front corners. This shot demonstrates that capability. It was shot at f/8 with focus placed on the protruding bolt. Even in the front corners the image is sharp. Download a hi res version by clicking here. |
Zeiss Touit 32mm f/1.8 Planar lens
The 32mm focal length of the Zeiss Touit has a 48°
angle of view. It weighs in at 7.41oz (210g) with a minimum focus
distance of 1.21' (37cm), a 52mm filter size, and apertures of f/1.8-22. This is a little shorter than the Fuji 35mm lens and gives the Zeiss a bit more of a slight wide angle effect. It is equivalent to a full frame 48mm.
 |
| Download each of the high res Zeiss 12mm Touit tests using the links below. |
I was also able to perform a comparison set of tests on the Fuji 35mm lens below. I think you will see that the corners of the Fuji lens are softer at the more open apertures.
 |
| Download each of the high res Fuji 35mm tests using the links below. |
Below are some downloadable files from the Zeiss Touit 32mm lens, which should demonstrate its very high resolution and low distortion.
 |
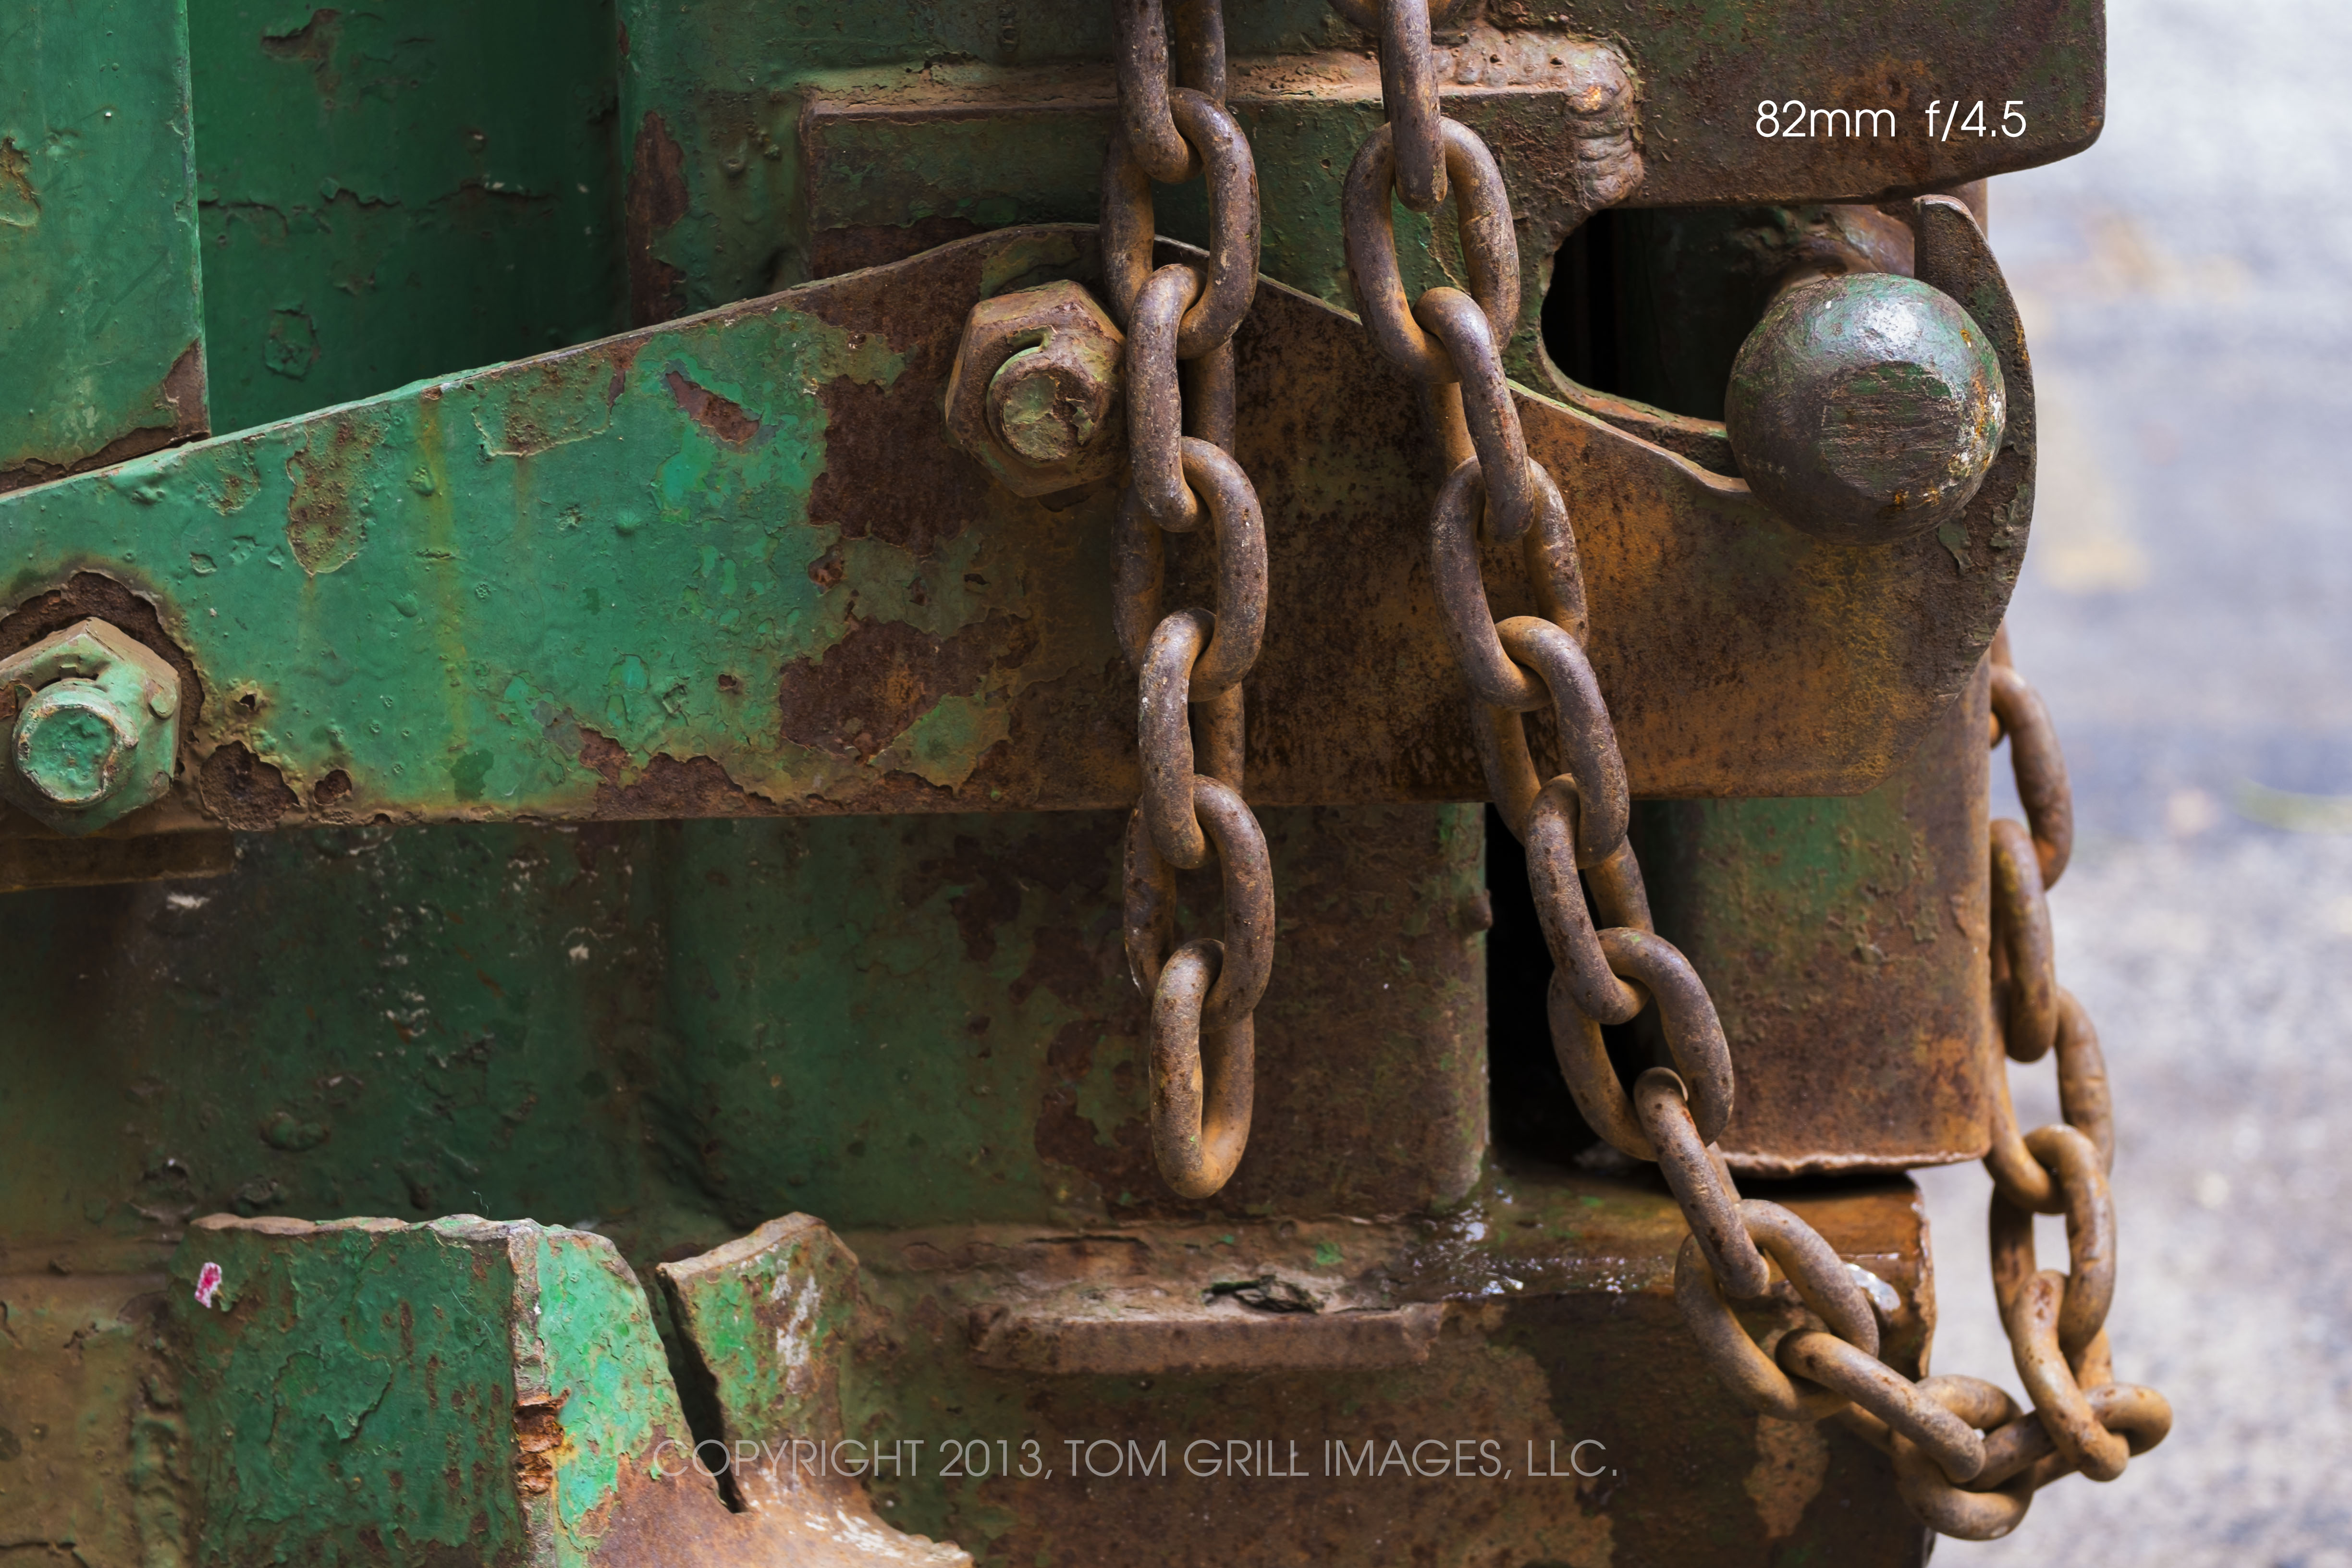
| This
is about as close as the 32mm lens will go. The shorter 48mm equivalent
focal length gives the perspective a slight wide angle rounding affect
when used close in like this. |
What
about bokeh, which refers to the degree of pleasantness in rendering
out-of-focus areas. Below are two images to illustrate the bokeh of the 32mm Touit lens. The roundness in the out of focus blurs is due to the roundness of the lens diaphragm.
 |
| Shot wide open at f/1.8. |
Conclusion:
I began by stating that the Zeiss Touit lenses were two of the best lenses I have ever tested, and hope that the sample images presented above show why I reached that conclusion. These are truly professional grade optics with exception resolution across the image plane, and no noticeable distortion.
If I had to pick one thing to complain about on these lenses it would be the tiny blue dot Zeiss uses as an index to align the lens when mounting it on the camera. I can see that the blue dot is an attempt to match the color of the Zeiss logo, but there is a reason most companies use a red dot. It is easier to see. The blue dot is not only too small, it is barely visible. So that's it -- my one tiny complaint.
We cannot help but draw comparisons between the Zeiss lenses and their similar Fuji X counterparts. Truth is the Fuji lenses are really very good, but the bottom line is that the Zeiss lenses are better. Is this difference worth the extra cost of $1250 for the Zeiss 12mm vs $899 for the Fuji14mm, or $900 for the Zeiss 32mm vs $599 for the Fuji 35mm? Naturally, this depends upon your own standards and the particular uses you have for these focal lengths, and also upon the fact that they are slightly different focal lengths. With wide angle lenses in particular, just a small change in focal length can make a big difference in angle of view.
 |
| This comparison shows the slightly wider angle focal length of the Zeiss 32mm on the left as compared to the Fuji 35mm on the right. |
My opinion is that the Zeiss Touit lenses improve the Fuji X-Pro1 camera to an image level that is commensurate with the top pro cameras out there, and I mean even the full frame models. If you can afford to go the extra few hundred dollars to upgrade to theses lenses, I think you will find they are well worth the price.
It will be interesting to see what other lenses Zeiss will be adding to the Touit series. The quality of these lenses is a real game changing upgrade for mirrorless camera systems.
 |
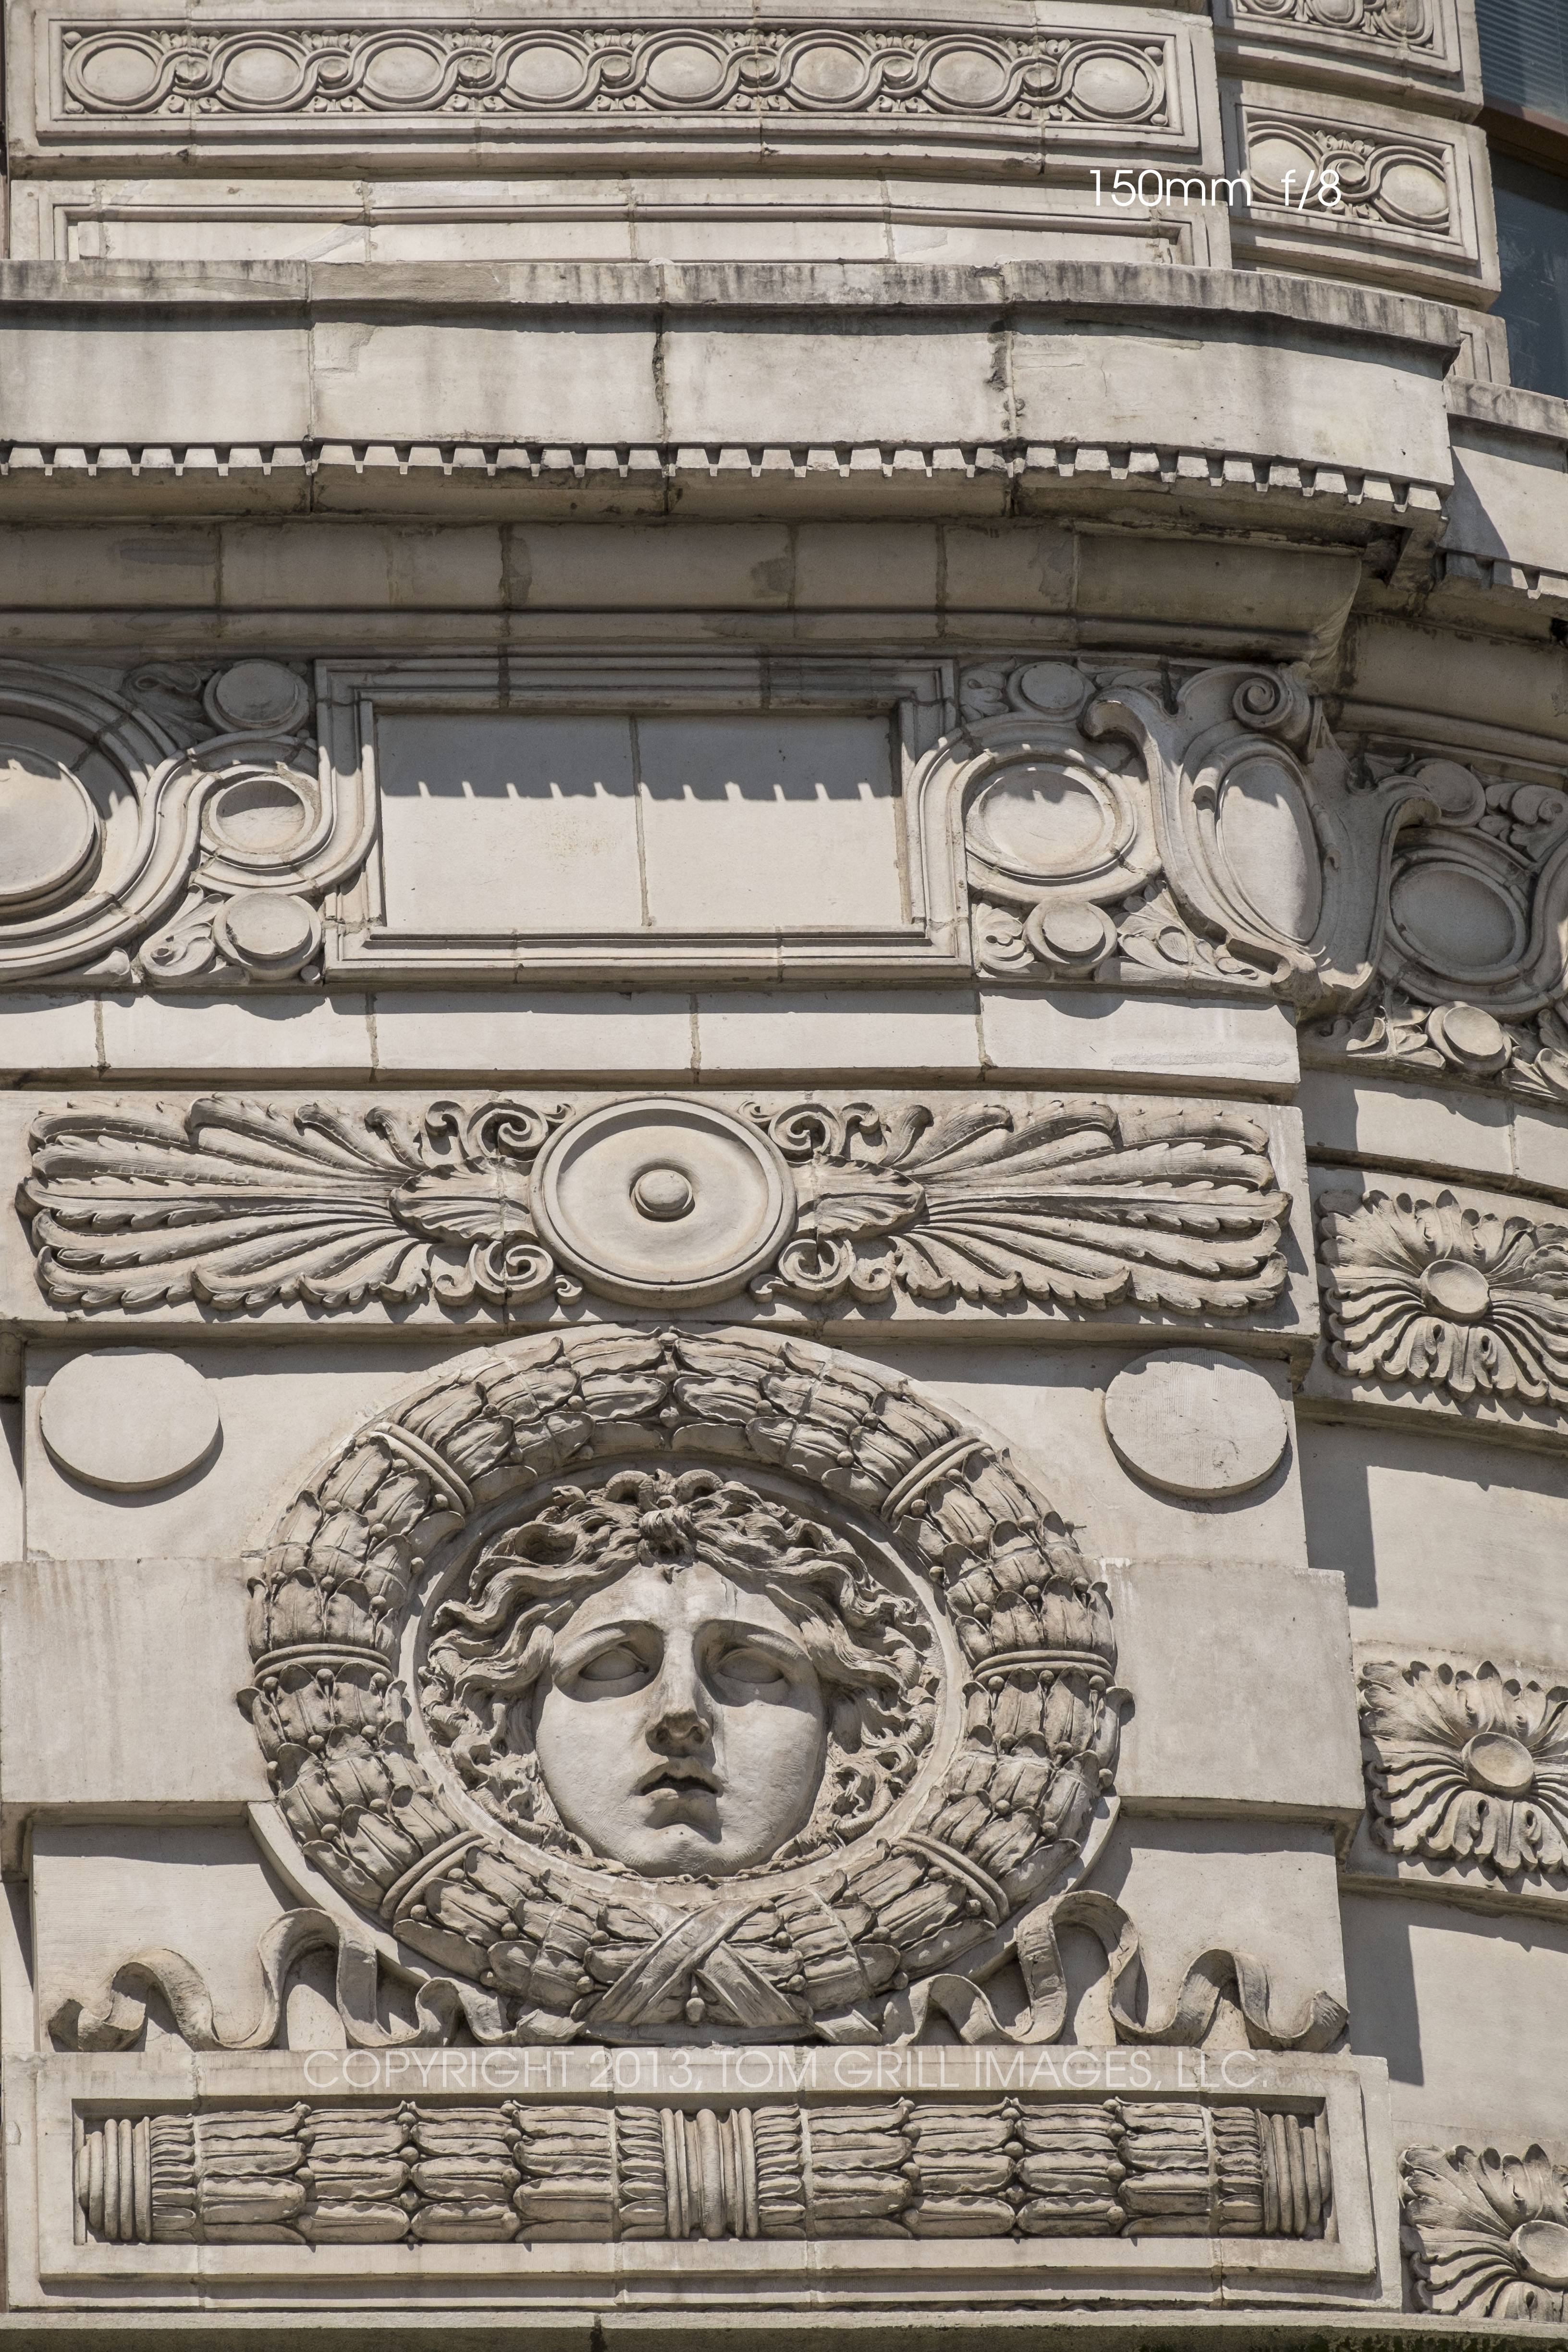
| A late afternoon shot with the Zeiss Touit 32mm lens at f/8. |
The
two images below illustrates the degree of corner fringing from the 32mm and 12mm
Touit lenses. Keep in mind that this is a very difficult test. I would expect
all lenses to show fringing in the corners under these circumstances,
which is to say an over-exposed, backlit shot with areas of strong
contrast and blown highlights. While you will find a small degree of
blue fringing in the images below, keep in mind that this is exceptionally
minimal to what I would normally expect from any lens in this
situation so the Touit lenses pass this test with flying colors. Also keep in mind this degree of fringing is easily correctable in post processing.
A special thanks to Jeff Hirsh of Fotocare for supplying the Zeiss Touit lenses for these tests. If you are a pro photographer in NYC you probably already know Jeff. If you don't, you should. He has been supplying professional photographers in New York's photo district for years. His shop is located between 5th & 6th Avenues at:
Fotocare
41 West 22nd Street
New York, NY 10010
www.fotocare.com


